The Guyson Corporation

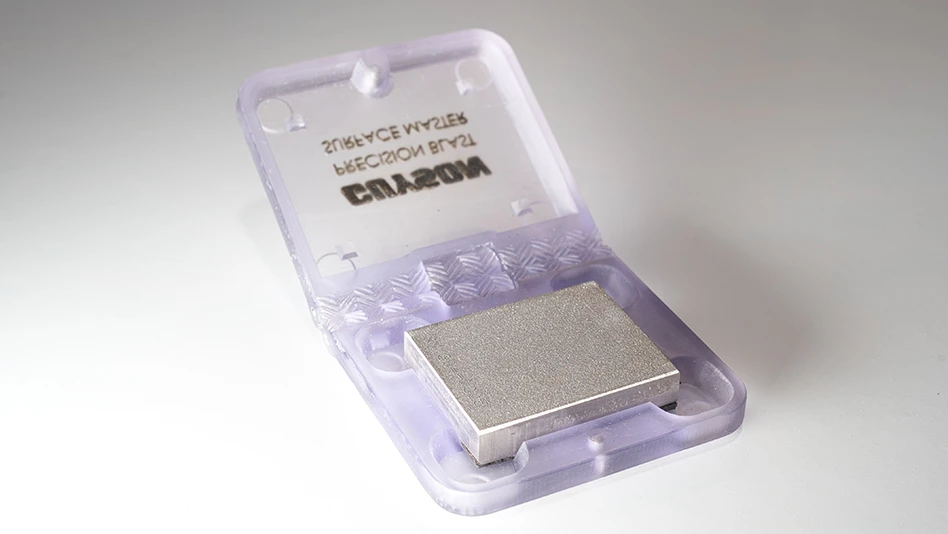
Guyson Corporation, a world leader in industrial blasting equipment, introduces a surface roughness specimen, based on a third-party certified Master Specimen of non-periodic Ra standard. These coupons are produced using a one pass blasting method and are quantified as per ASTM D7127.
The importance of meeting engineering specifications for Ra finishing standards in nonperiodic finishes cannot be underestimated. The result affects how accurately a part will operate. To date, there has been no consistent way to achieve this goal. To address this unmet need in the industry, Guyson Corp., the world leader in industrial blasting equipment, has just introduced a surface roughness specimen, based on a third-party certified Master Specimen of non-periodic Ra standard. These coupons are produced by several representative blasting methods and are quantified as per ASTM D7127.
Guyson Institute of Standards
The Guyson Institute of Standards was created by Guyson, with the sole purpose to define the Ra finishing standards for non-periodic finishes for the blast finishing industry. For the first time there is an accurate process that follows ASTM standards, in the most accurate way the world has seen.

Until now most roughness certified coupons were made to reference a periodic machine surface. A periodic surface is one that has a repeated pattern created by a machine cutting blade moving back and forth. Blast finishing is a nonperiodic process and its Ra value should not be determined with a periodic specimen which will give you an inaccurate result.
Unprecedented accuracy to metal finishing
Previously, a nonperiodic blast specimen did not exist creating a problem when determining a precise roughness value on your profilometer. This added to the inconsistencies in the results.

The Guyson Institute of Standards has created a new blast specimen to determine a specific Ra Value on a calibrated profilometer which will allow you to correctly match that Ra Value on your product finish.
All previous Ra measurements up to this point, are inconsistent because there is no Scientifically certified specimen to determine the gloss value of a non-periodic finish. The Guyson Institute of Standards uses the Mitutoyo Surftest SJ-410 in our testing lab to: Measures surface roughness; Measuring Range of 25mm (1”) in X; Detector Z range max of 800μm; Resolution of 0.000125μm (at 8μm range); Measuring Force 4mN
Revolutionizing the industry
If your product involves people’s welfare, now you can make sure that you have all your specifications defined and certified. With the Guyson Institute of Standards blast specimen, you have a scientifically accurate starting point for the Ra finish you want on your product. This cutting-edge product will redefine how you determine the finishes for your next blast cabinet RFP. These specimens will give you the ability to monitor the consistency of your finish throughout your manufacturing process and meet or exceed all specifications for a scientific measuring device.
Guyson manufactures the coupons under repeatable laboratory conditions using Guyson robotic blast cabinets. These machines are specifically created for the development of standardized Ra coupons. The Guyson Corporation has ushered in a new age of accuracy with this technology.
Guyson has a Patent Pending on this product, and it’s available only through Guyson Corp.
Latest from Today's Medical Developments
- Arcline to sell Medical Manufacturing Technologies to Perimeter Solutions
- Decline in German machine tool orders bottoming out
- Analysis, trends, and forecasts for the future of additive manufacturing
- BlueForge Alliance Webinar Series Part III: Integrate Nationally, Catalyze Locally
- Robot orders accelerate in Q3
- Pro Shrink TubeChiller makes shrink-fit tool holding safer, easier
- Revolutionizing biocompatibility: The role of amnion in next-generation medical devices
- #56 Lunch + Learn Podcast with Techman Robot + AMET Inc.


