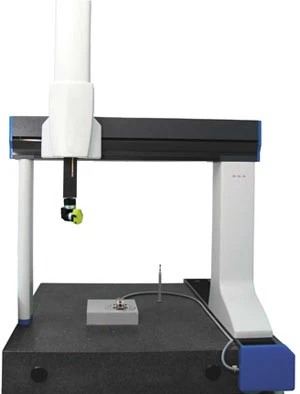
NVISION ANNOUNCES THAT IT IS NOW DELIVERING THE MAXOS, a turnkey non-contact inspection solution, to North America. Clients confirm that the MAXOS outperforms coordinate measuring machines (CMMs) by an average of 8 to 1 in terms of inspection speed, and also offers greater accuracy. The MAXOS solution includes a non-contact light probe, a bridge or horizontal gantry, a turntable option, installation, custom programming, training and maintenance.
The MAXOS system is designed for automated high-speed production inspection. It can inspect polished and unpolished metal, plastics and glass. Applications include turbine blades, pump components such as impellers, medical components such as implants, and other high-precision components.
The MAXOS system is much faster than traditional CMMs because, unlike CMMs, the measurement speed is not limited by the need to make physical contact with each point that is measured. The MAXOS provides an exceptionally high accuracy of ±2mm on matte surfaces, and ±10mm on polished metal. It can achieve a point spacing resolution of 0.2mm without pausing.
Another key advantage of the MAXOS system is its ability to measure highly polished surfaces and mirror-finished surfaces without a coating. Coatings introduce dimensional inaccuracy, take time, and raise the risk of contaminating the work environment.
The MAXOS system utilizes up to seven axes. All of the axes can be controlled simultaneously to ensure smooth and fast movement. The MAXOS will create its own alignment for the measurement of a part based on an alignment file which typically compares cross-sections and features to a pre-defined design intent. A complete inspection report is output in real-time at the end of the measurement routine.

Explore the October 2007 Issue
Check out more from this issue and find your next story to read.
Latest from Today's Medical Developments
- Arcline to sell Medical Manufacturing Technologies to Perimeter Solutions
- Decline in German machine tool orders bottoming out
- Analysis, trends, and forecasts for the future of additive manufacturing
- BlueForge Alliance Webinar Series Part III: Integrate Nationally, Catalyze Locally
- Robot orders accelerate in Q3
- Pro Shrink TubeChiller makes shrink-fit tool holding safer, easier
- Revolutionizing biocompatibility: The role of amnion in next-generation medical devices
- #56 Lunch + Learn Podcast with Techman Robot + AMET Inc.


