Edge geometry specifications are increasingly in the accuracy ranges of roughness values. And when edge geometries on mechanical components became vital to component function, they must be measured reproducibly. This task is becoming increasingly important in the quest for ever higher precision in key components. For example, in common rail diesel injection systems or control slides in hydraulic components edges have sealing functions. Chamfers on edges in the range of 5µm are already being specified.
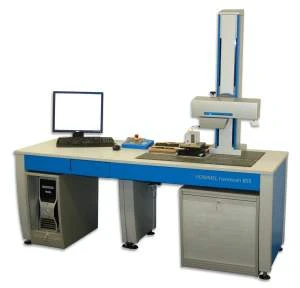
According to Hommel Etamic, for the first time, edge geometries can be measured accurately and reproducibly in production metrology in a single pass of the stylus. The new evaluation method uses the HOMMEL nanoscan roughness and contour measuring system.
To evaluate edge breaks, it is necessary to determine the location at which an actual contour leaves the nominal contour in the vicinity of the body edge (DIN 13715). But the challenge is to define the limits at which an edge is determined. What makes things additionally difficult are possible protrusions due to edge burr which can occur during machining and which impairs the function of the edge. To solve the problem, Hommel Etamic developed a method by which both edge geometries and any warp can be measured and evaluated automatically in one pass.
The HOMMEL nanoscan roughness and contour measuring system provides the means to do this, offering resolutions sufficient for roughness measurements and also for the wide measuring ranges are necessary for contour measurement. The workpiece surface is transferred to a laser interferometer by a tactile stylus tip. The technology used here is a modern digital distance measurement in which high-precision dimensional bodies are scanned by an interferometer using laser light.
Due to the high resolution of the interferometer of 0.6nm, structures of the workpiece surface can be recorded which range from the submicrometer range to 24mm or 48mm (depending on the probe arm length). These properties allow this measuring system to be used wherever the roughness and contour of a workpiece surface are to be measured in one pass. The horizontal and vertical axes are also equipped with high resolution, digital scales. According to their function with the focus on geometric dimensions in contour measurement, they offer a resolution of 0.1 micrometers over their entire length which is 200mm, for example, in the horizontal axis.
Such measuring accuracies require a high-precision mechanical axes structure in addition to metrology. Their remarkable precision is reflected in the observation of the basic disturbances caused by electrical interference or mechanical causes found in every technical system. A new Hommel Etamic drive system greatly reduces the basic mechanical disturbances. This makes the instruments suitable for measuring the finest roughnesses. The precision of the interferometric measuring principle also contributes to the high linearity of the measuring system. It is so accurate in the combined roughness and contour probe that it requires no compensation.
The result is that the nanoscan can measure and evaluate edge geometries as well as any burr automatically in one pass with the accuracy required today.
The new method forms so-called regression lines along the surfaces approaching the edge which are as long as possible but at least twice the length of the edge break. Surface limits are defined on the inside and outside parallel to this. This forms a corridor the width of which includes the permissible roughness and waviness of the surface concerned. Contour deviations exist if actual contours intersect the inner or outer surface limits. These are relevant for the evaluation of the edge break at the inner limit and at the outer limit are an indication of material build-up, such as the formation of a burr.
The points of intersection at which contour deviations cross the inner or outer surface limit are taken relative to the point of intersection of the respective surface limit for edge evaluation. These points of intersection can be defined and dimensioned very stably. Edge breaks can be measured and evaluated reproducibly for the first time by this new method. Since all measurement and positioning axes of the HOMMEL nanoscan can be controlled by CNC commands, the measurement and evaluation is automatic. These measuring tasks can therefore be performed by the worker in production.
In most cases other surface parameters are also evaluated on the workpieces in addition to the edge geometry in accordance with ISO 4287, ISO 4288, ISO 1356, ISO 12085 or JIS B -0601 or other contour characteristics such as distances, angles and radii determined.
Hommel Etamic is currently working on being able to evaluate very small radii reproducibly with this method. The standardisation of the method which is already being used successfully today in the automotive supplier industry where it contributes in connection with the HOMMEL nanoscan roughness and contour measuring system to achieving even higher accuracy for the benefit of functional improvements is also being pursued.
HOMMEL ETAMIC AMERICA

Explore the June 2009 Issue
Check out more from this issue and find your next story to read.
Latest from Today's Medical Developments
- Best of 2024: #5 Article – Accelerating medical device development with freeform injection molding
- Best of 2024: #5 News – Complexity, the enduring enemy of medical cybersecurity
- Best of 2024: #6 Article – Closing the global product information gap
- Best of 2024: #6 News – NUBURU enters medical device market with order Blueacre Technology
- Season's greetings
- Best of 2024: #7 Article – Synchronized machining processes for medtech
- Best of 2024: #7 News – 3D printing could revolutionize treatment for cataracts, other eye conditions
- Best of 2024: #8 Article – Perfecting the CMP process for surgical blades

